Making your own DIY friendship bracelets is very easy. With only a few things that you’ll find from the craft store and at home, you’ll be able to make tons of these. The great thing about making DIY friendship bracelets is that you can customize them to better suit you and your friends’ styles. The effort that goes into making these can never go unnoticed and unappreciated. In fact, making DIY bracelets can even be a fun bonding activity for you and your friends.

Today, you’ll start learning about the simplest friendship bracelet making method there is then we’ll show you ways to amp it up. To do this, you will need the following:
- A pair of scissors
- Thread, strings or cords of your choice (more colors = more fun)
- Glass or plastic beads
- Clip board
- Small metal charms
- Jewelry clasps / closures of your choice
Start by taking three strands of your preferred material to make the bracelet. If your chosen string, cord or thread is too thing, you can take as much as you want and bundle them up as one. Measure each of the three strings by looping them about twice or thrice around your wrist then cut. Once you’ve got all 3 measured, bring them together and tie them in a knot then clip it on to your clip board to secure it from wiggling while you do the craft.

The simplest thing to do now is to start braiding the strings like you would your hair using the traditional braiding method, or the French braid method. Braid it all the way through until you reach the end then attach the clasps and cut off the excess. This would be the most basic design for friendship bracelets. Of course, you can use more intricate styles like fishtail braids and 5 strand braids using more strands if you know how to do them.

To amp it up, start with the same method and braid about a quarter of the whole bracelet. Once you’ve reached the first quarter, start inserting beads with every strand that you overlap on the others. Continue doing it until you’ve braided about a third of a quarter of the entire bracelet then do the plain braids on the last quarter and attach clasps. It should look something like this:


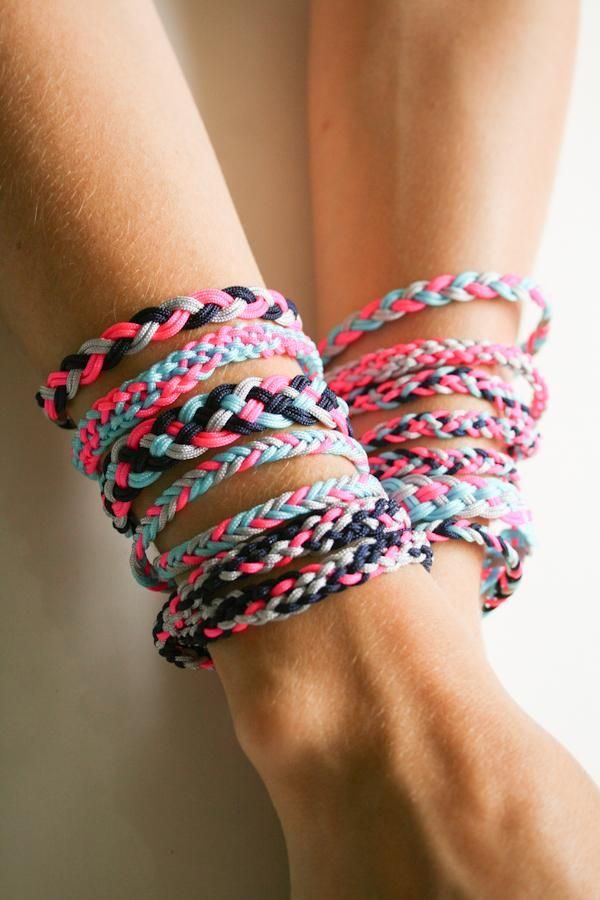
Another style that you can do is a kidada wrap inspired friendship bracelet. To do this, simply measure twice as much string than the regular bracelet. The same procedures go for this style except that you will need to attach little charms along the way from start to finish. Braid all of the string until you’ve only got enough left for the clasp. Don’t worry about having excess string or thread as this is supposed to be a wrap bracelet.


Tags: dit friendship bracelets ideas DIY Bracelets diy friendship bracelets easy diy friendship bracelets friendship bracelets